
1. Python getting setup#
1.1 Setting up on your own machine - what to install:#
In the sessions in Nottingham we have desktop PCs available with this software preinstalled but you’ll want to set up your own machine to work on outside of the sessions or if doing this course remotely.
Before installing any of these softwares please check whether you already have them installed. Press the window’s key and type their name to check.
Install:
1.2 Some setup stuff for VsCode#
Check that vscode has been correctly installed.
Press windows button and type code.
VsCode can be used with pretty much any programming language. It relies on installing extensions to increase the functionality whilst keeping its overall size small.
To use VsCode properly you should always open a folder. During the course I will send you a link to project files for that week. We’ll walk through this process later. Clicking on the 2 documents icon on the sidebar (shown below) will open a collapsing pane that shows all the current files and allows you to create new ones, rename, delete etc.

If setting up VsCode for yourself on your own computer you’ll need to install a few extensions. You can do this by clicking on the 4 squares icon on the side bar. You then need to search for the extension and click the install button.
Essential extensions:
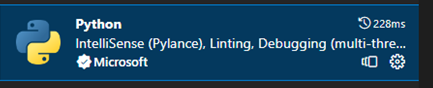
This extension contains python features such as, Intellisense, Linting, Debugging.
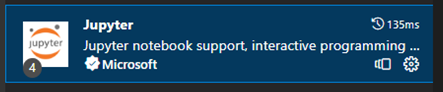
This is required to run a Jupyter Notebook inside VsCode.
Optional extensions:
I also find autodocstring a particularly helpful extension. It will help create skeleton docstrings which you can then fill in.
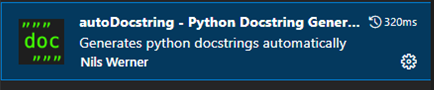
1.2.2 Command Palette#
VsCode is setup so that everything can be accessed quickly through the command palette. To access it type: ctrl + shift + p (on a Mac cmd + shift + p)
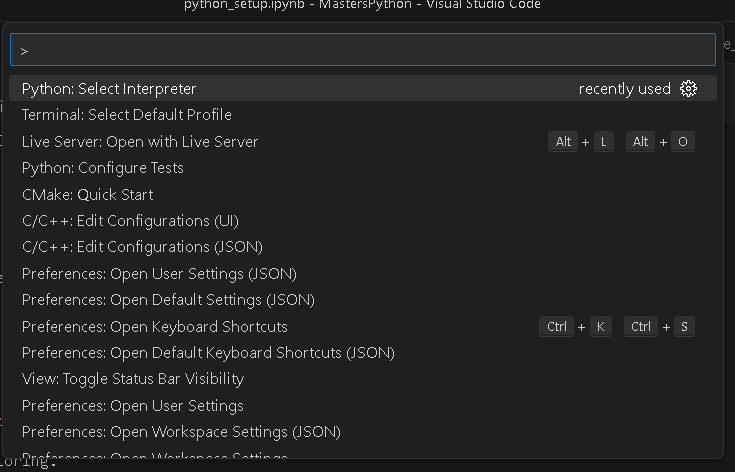
Typing words into the bar will enable you to quickly find the setting you want. Two things to check here:
Terminal:Select Default Profile–> SelectCommand Prompt.
If on Mac or Linux you want to select your default terminal.
Python: Select Interpreter–> Allows you to select which python / environment you will use. After we’ve discussed environments below we’ll use this.
1.3 Classroom50 and weekly project files#
1.3.1 First time setup of Classroom50#
N.B you may need to repeat some of this the first time you use a new computer.
(We assume you are working on Windows here. Hopefully if on Mac or Linux you can figure out the equivalent steps)
Setup a github account
Check all software is present and working:
Open a
terminalCheck git is working in terminal : type
gitcheck you get help print outCheck github cli is working in terminal : type
ghcheck you get help print outregister username and email globally by typing the following:
    git config --global user.name "YOURGITUSERNAME"
    git config --global user.email YOUR@email.com
    git config --global core.editor "code --wait"
Now open vscode again and open a terminal within vscode

Check that the steps 3-4 are still working (If not you may not have added the software to your path variable Add program to path variable.)
Within vscode sign in to github by clicking on the github icon on the left hand side
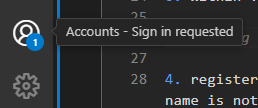
Once you have registered using the Microsoft form or we have added you to the system you should be able to register for classroom50 by clicking on the link sent to you via email.
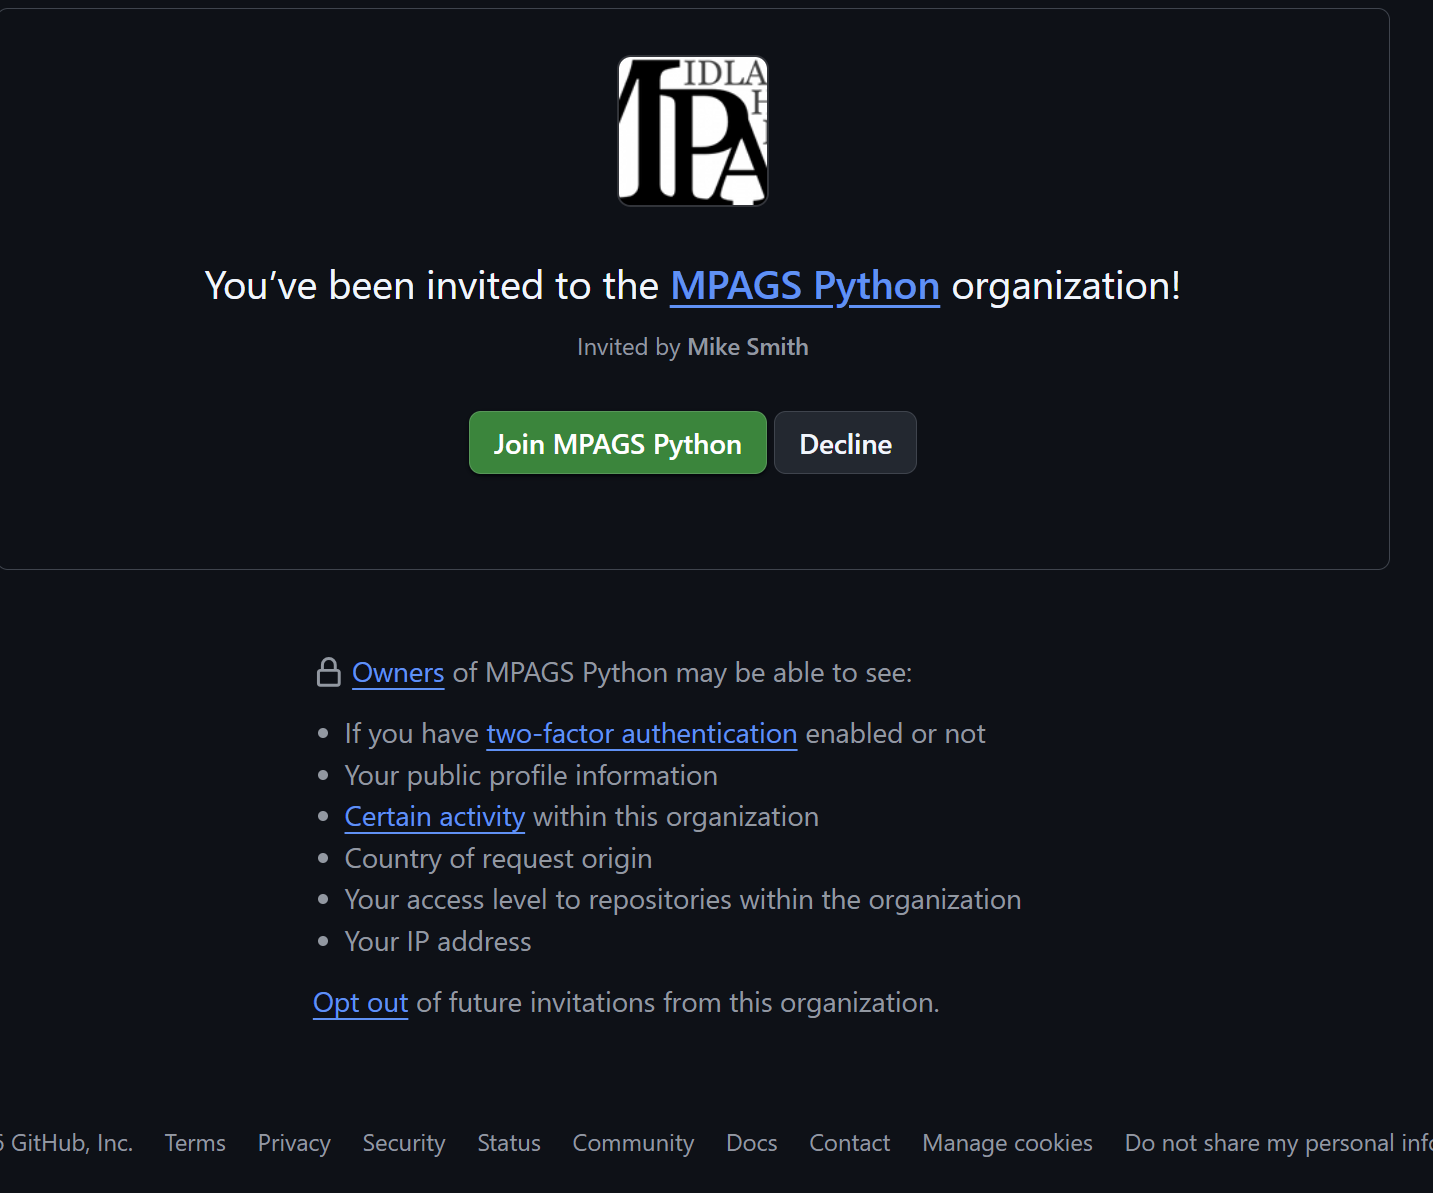
Open your file explorer and somewhere in your Onedrive, create a new folder called
phys4038.
1.3.2 Weekly procedure for getting teaching materials#
N.B you only need to do this once per assignment (if you work on a laptop or different computer at home you may need to repeat).
Using classroom50 is fairly simple but since it is so fundamental we’re going to walk through the important things you’ll need to do each week. Github Classroom is essentially a way to synchronise files between a remote webserver and your computer. Each week you will be sent a link which will take you to a page like the one below when you click on it. Accept the assignment.
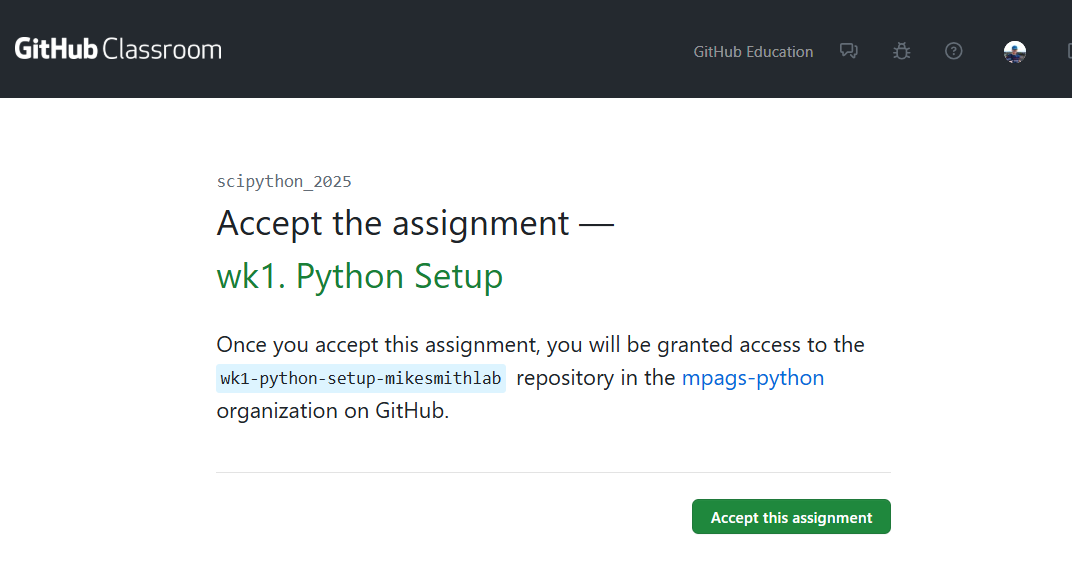
When you accept the link a personal webspace is made on this remote webserver for you containing that weeks files. If you click open the repo you should see the web space.
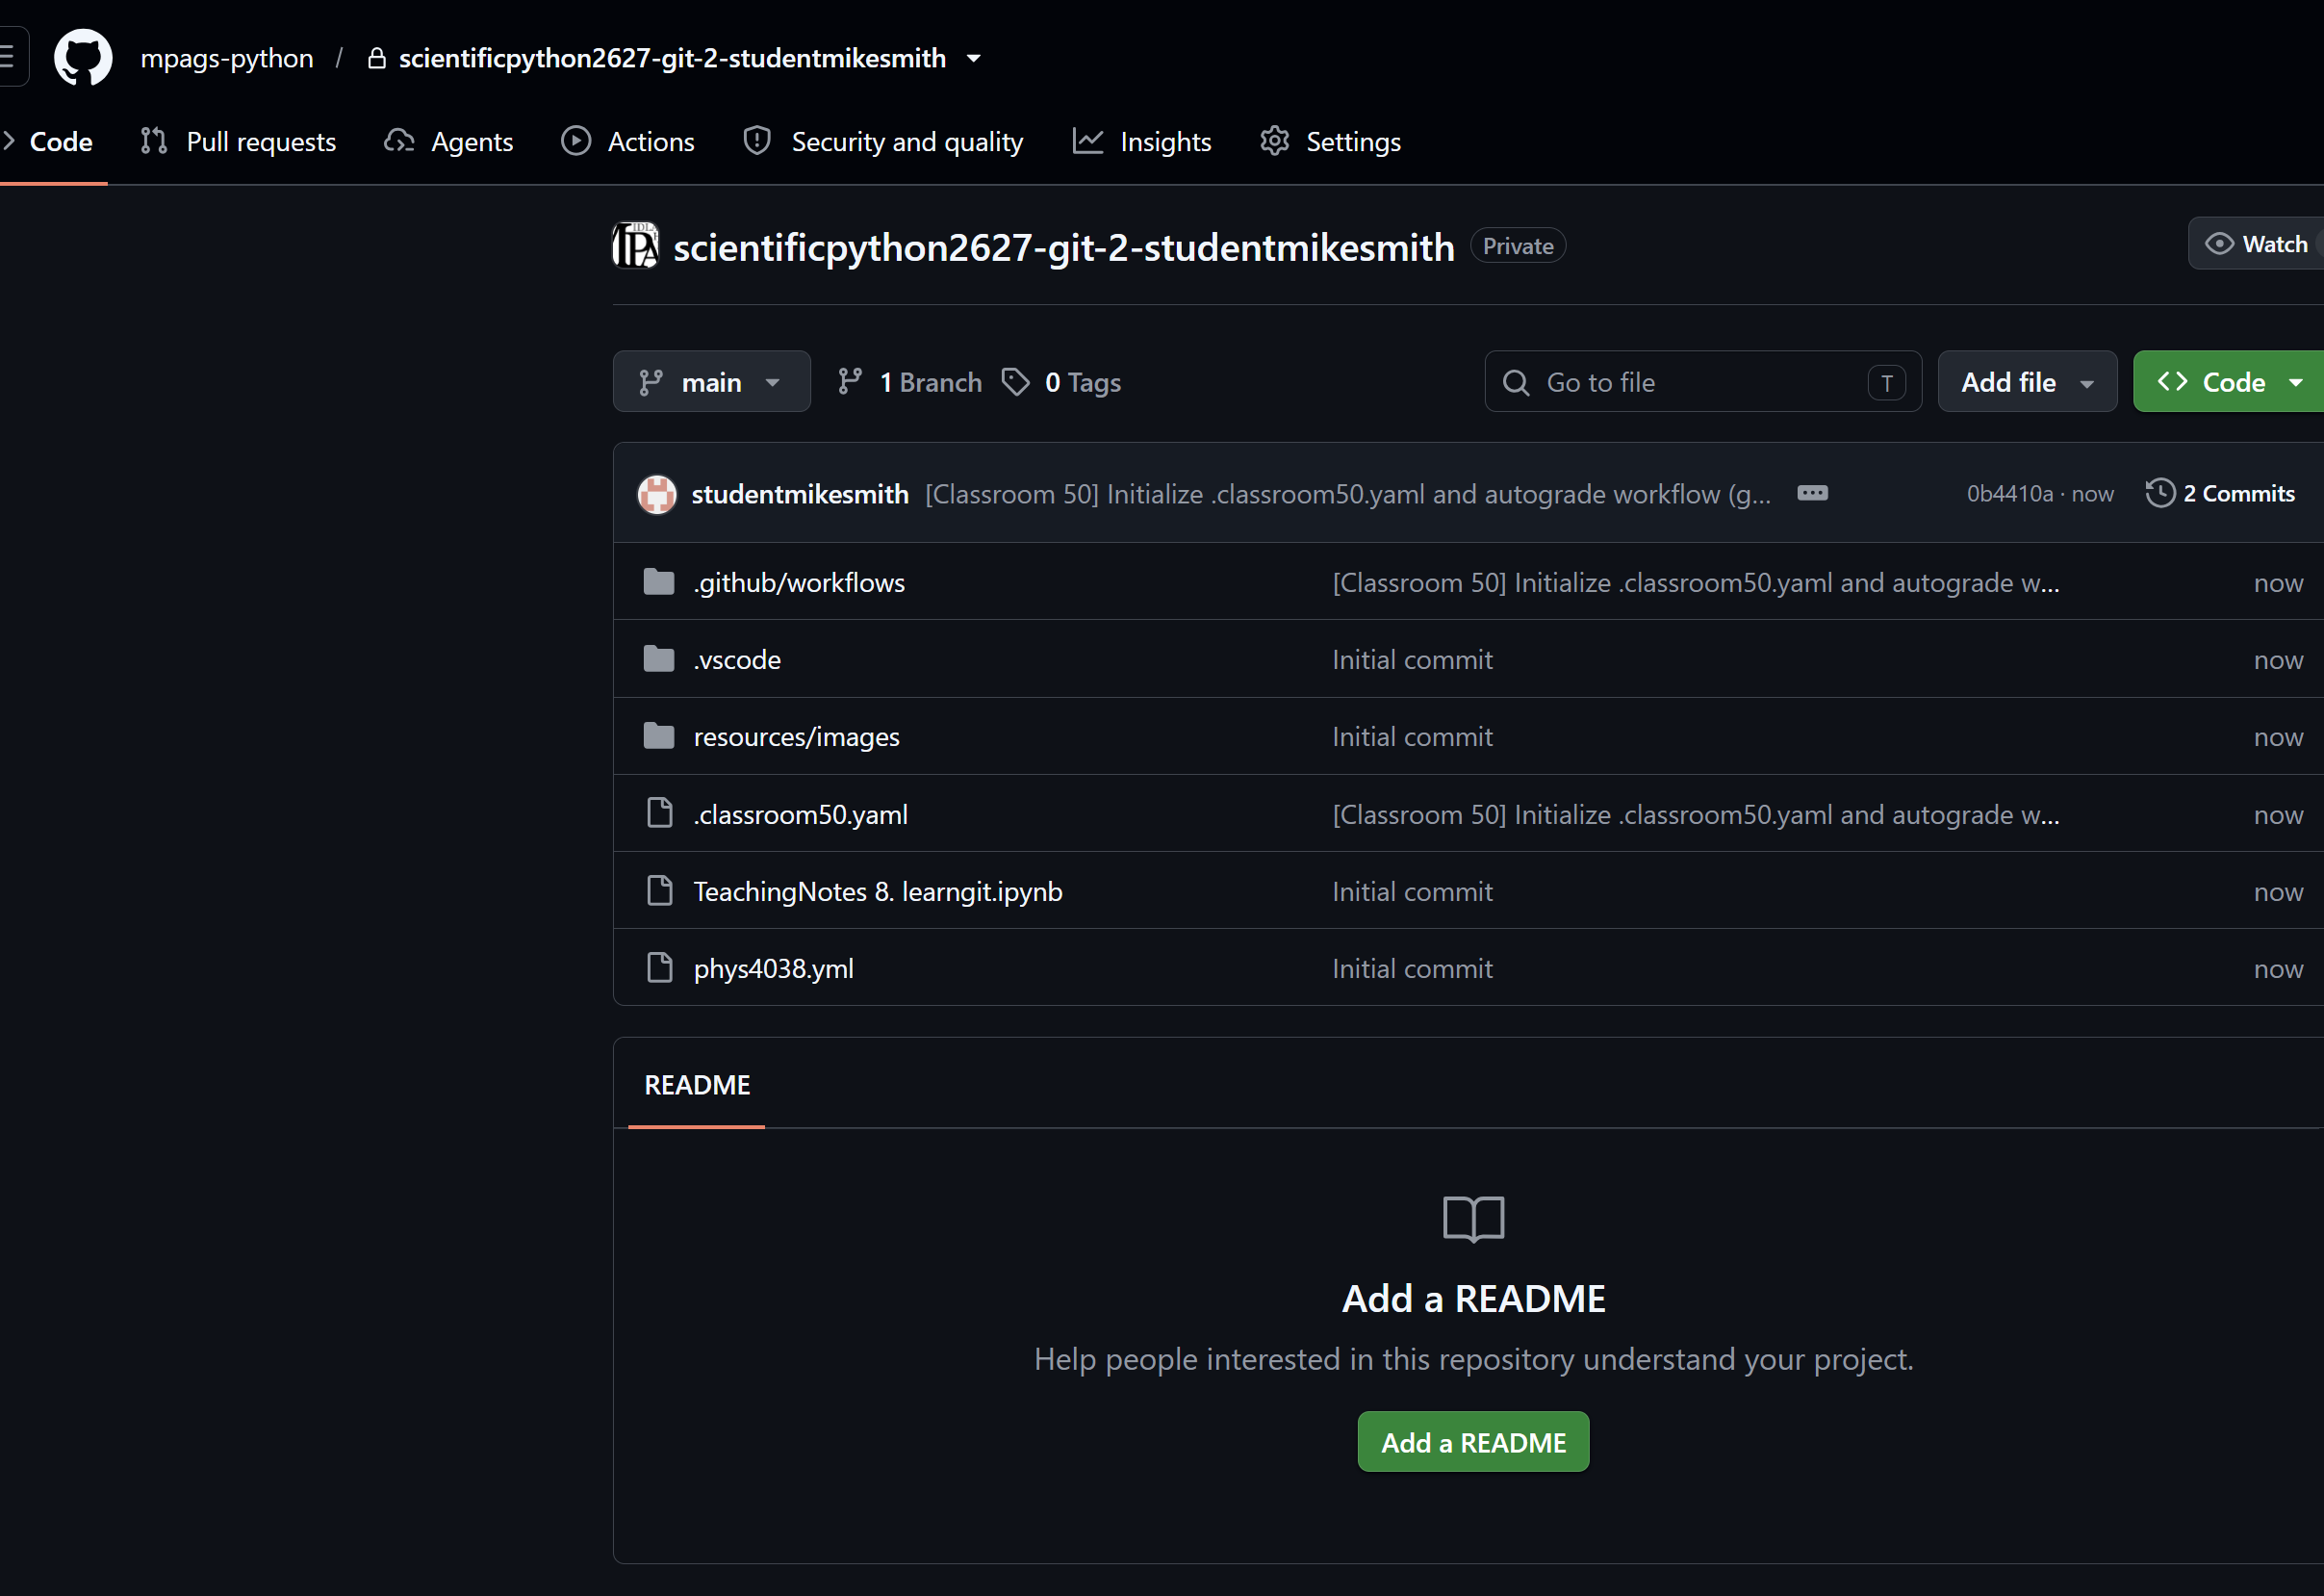
On the webpage you opened you should see a big green button that says Code. Open this and copy the command that appears in the box. It should look something like: https://github.com/mpags-python/scientificpython2627-git-2-studentmikesmith.git but setup with your username and the name of the assignment you accepted.
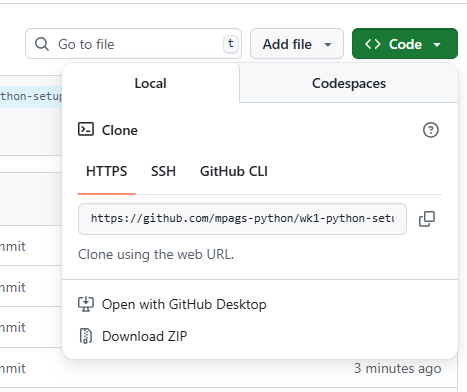
On your computer, open the file explorer and go to the folder you created in step 8 of previous section.
Then right click in the folder and select Open in Terminal. For this step it doesn’t matter if this is a command prompt or powershell terminal etc.
Into the terminal type git clone and paste the command you copied from the web page. It should look something like this:
git clone https://github.com/mpags-python/wk1-python-setup-mikesmithlab-1.git
This will copy files from the remote webserver to your local computer. You should now see a new folder in the file explorer with a name like wk1-python-setup.......
N.B You can access all the online projects from different weeks as you accept them here: MPAGs repository
Once you have done this open this new folder.
Windows:
double click the file called setup_windows.bat. Some simple setup should take place which prints outs some instructions for you to follow at the end.
If you are using a Linux or Mac Computer it is slightly more complicated. Open a terminal from the location inside this new folder. Then type: uv run --no-project setup.py Follow the instructions printed out.
Here is a summary you can follow each week:
Click on the link and accept the assignment.
Open your repository.
Click the green
Codebutton and copy the command.Open the file explorer and go to the PHYS4038 folder.
Right click in the folder and select
Open in Terminal.type
git cloneand paste the command you copied from the web page.move inside the folder and use the appropriate setup script and follow the instructions.
Once you have done this once you should be able to just open Vscode directly. However, if you encounter any issues you can just rerun this setup script. You will certainly need to do this if you use a different computer.
1.3.3 Working with the weekly files#
Now that you have the files for this week open in vscode you can start working on them.
Once you have finished working on the files during that session you need to sync the changes you have made with the remote webserver. There is an exercise to guide you through this but there are 3 steps to remember:
Add changes
Commit changes
Sync changes
The first two steps are usually done at the same time. You can think of this as like saving your changes but it applies to any files in the folder you have open in vscode, not just the one you are working on. Open up the git tab (3rd symbol in the sidebar):
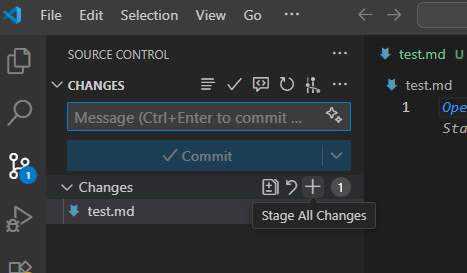
To add the changes you’ve made, hover over the top + symbol as shown (there are 2. This one only appears as you hover level with the word Changes and a tool tip says Stage All Changes). Click on it. Now type a descriptive message into the text box and then click the big blue Commit button. This effectively saves the changes you have made to the files in the folder to your local computer.
The third step is to sync the changes you have made to the remote webserver. Once you have committed, this is done by clicking on the Sync Changes button at the top of the git tab. This will push (ie upload) your changes to the remote webserver and pull (ie download) any changes that have been made by others since you last synced.
Making sure your local files are up to date#
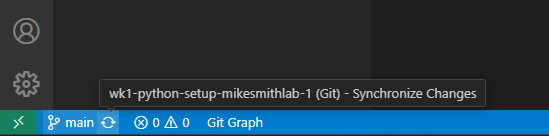
Every time you start work on a computer you need to make sure that your local files are up to date with the remote webserver. This is done by clicking on the Sync Changes symbol at the bottom of the vscode window (2 arrows forming a circle). This will update your local files.
Just remember#
Whenever you sit down at any computer you start by pressing the sync button
when you finish working at any computer
add,commitandsyncagain.
Forgetting this can lead to issues – if you realise that something is not working don’t worry we can recover it. Speak to us.
Open the Exercises_1_python_setup_exercises.ipynb file and follow the simple exercise to get you comfortable with this in section 1.2 with this process before continuing.
Make sure you are comfortable with this process. Only files on Github will be visible to markers, so it is important that you sync your changes each week.
1.4 Tools for using python#
There are a range of software tools to support python development which make your life easier and will help prevent issues.
Virtual environments (virtualenv, conda environments, uv)
Package managers (pip, conda. poetry, uv)
Pip and Conda have been used widely and are still commonly used in Academia. However, the most up to date tool is uv. This is being widely adopted in industry and we will therefore be using this throughout the course. We have left legacy notes from an older version of this course for you to refer back to should you find you need to work with conda tools.
1.4.1 Virtual environments#
Python often comes pre-installed on many operating systems. However tempting, don’t use it!!! Installing python packages directly will create many problems for you later on. Virtual environments are effectively a sealed box around your python installation which you use with a specific project. They enable you to completely isolate the particular versions of python and installed packages so that they do not influence or conflict with work for other projects.
1.4.2 Package managers#
When you program in Python you don’t just use the core language but a myriad of code written by others to extend or simplify writing your own. This includes well known packages like numpy or obscure packages you found on someone elses github page that solved a problem you had. All of these packages evolve over time as people work on them. This results in various constraints (“dependencies”). For example, a package might require a very modern version of python since it relies on one of the features introduced more recently. If you have multiple packages installed, working out a combination of package versions that work together can be very difficult.
To work this out manually can be difficult and so we rely on package managers to install things for us. If we ask it to install numpy it will look at the other packages already installed and work out whether to install the latest version or some other version that will work better.
1.4.3 Using UV#
In the introduction we mentioned Pip (a package manager) and virtualenv (a virtual environment) and conda (both a package manager and a virtual environment). These have been used for many years. We have left the legacy notes from an older version of this course where we discuss using Conda if you want to look at it. However, on this course we want you to be using the latest tool which is called UV.
UV is extremely fast and handles installation on different OS much better than its predecessors.
We will start with a basic explanation of how UV works and then cover a few different workflows that you might need.
1.4.3.1 How UV works#
UV stores all the packages and python executables in a folder called .venv. This is usually located inside your project directory. However, see the box below about Onedrive and some changes we’ve made for this course.
Warning - Conflicts between UV and Onedrive#
All the guides you will find on the internet tell you not to put your project files inside Onedrive when using UV. The reason for this is that Onedrive is overzealous and insists on immediately syncing any tiny change. In the standard approach to using UV the .venv folder is stored inside your project folder. UV creates lots of little files which change frequently, this combined with Onedrive’s deisre to sync everything can really slow your computer down. However, moving project files outside Onedrive means the only way to back things up is using github as we discussed above. The proper approach is to store your project outside onedrive and use Github to back up your files.
However, University computers being centrally managed have a habit of cleaning up local files! On top of this we decided there was a risk whilst you are getting to grips with these new tools that something could go wrong and you could lose important files. As a compromise we have provided a setup script. This takes the .venv folder and moves just this to a different bit of your computer to avoid these issues whilst leaving your project files in the same folder, synced via Onedrive.
If you want to carry on using Onedrive in other projects you can copy the setup script, setup.py, pyproject.toml and .vscode folder into a new folder and it will work in the same way.
1.4.3.2 pyproject.toml#
UV relies on several key files in your project folder:
uv.lock
pyproject.toml
You can think of these as a file where you specify what you want (pyproject.toml) to the UV package manager and one where UV defines very precisely what it installed (uv.lock). For example, you might say you want numpy 2.0 but uv.lock will specify the exact build number used in the installation which is a lot more specific. You should only ever edit the pyproject.toml.
If you look in the project folder you will see a pyproject.toml file. Open this and take a look at the contents. You will see a number of different sections:
[project]defines various metadata associated with your project. It has a couple of fields that you should notice:nameobviously this sets the name of your project.requires-python = ">=3.11"here we are telling uv we want it to install a recent python version.
[dependencies]this is where we specify what packages we want installed. For each package we have a few optionsLeave UV to decide which version to install by just specifying the name of the package
Specify a minimum version eg.
"numpy>=1.26.0",Specify a specific version number eg.
"numpy==1.26". We can give as much or as little detail as we want. 1.26 means any version number that contains 1.26, so uv may install 1.26.1 or 1.26.3. If we wanted to we could specify"numpy==1.26.1"but its best to always only specify things that matter. The more specific you are the more constraints it imposes which may make it impossible to install what you request.
There are other sections but these are the ones you may need.
1.4.3.3 Modifying a project’s dependencies#
We can add dependencies in two ways:
We can manually write them into the dependencies list as comma separated strings inside the pyproject.toml.
We can add them from the terminal, for example
uv add numpyand thenuv add pandas>=2.2.0. This automatically adds the request to the dependencies section of your pyproject.toml.
You can also remove dependencies in a similar way:
Manually delete them from the pyproject.toml
At the terminal:
uv remove numpy
Warning - updating UV whilst a Jupyter notebook is open#
When working with Jupyter notebooks we found that if you try to update things you can run into two issues:
Occasionally the package you added doesn’t seem to work in the notebook. This can be fixed by restarting the kernel (there is a button at the top of the notebook saying Restart).
Access Deniedwhilst trying to remove a dependency. This occurs because your Jupyter notebook is currently linked to the kernel and is actively preventing changes. Shut the Jupyter notebook whilst you run the command and then reopen it.
1.4.3.4 Installing everything with UV#
At this point we have simply modified the pyproject.toml and have yet to install anything. To do this open a terminal inside vscode. At the prompt type uv sync. You will see uv installing all the packages.
If you make any changes to your project after you have set it up, for example adding an additional dependency, you simply repeat the uv sync command to update everything.
1.5.1 Using the terminal#
Open a terminal in vscode.
If you want to interactively test some python you can type uv run python (typing python will normally result in the same thing). You should see a prompt with 3 symbols >>>. We can now type python commands directly into the prompt one at a time e.g. print("Hello").
In an IDE (integrated development environment) like vscode you will usually have typed your commands into a script which is a file with a .py extension such as main.py. You can run this script from the command line by typing either uv run python main.py or just python main.py.
(N.B sometimes if you have multiple python installations on your pc and not everything is configured correctly there is a danger that typing python may not use the version installed with uv via your pyproject.toml. Often this is ok but something to be aware of if you start getting errors. To be sure you can activate the environment. By copying the activate line generated in the setup script)
1.5.2 Using the IDE to run a script#
Whilst there are lots of IDEs the two main leaders in the python world are:
There are also a lot of online approaches:
cocalc.com
repl.it
Github codespaces
colab.research.google.com
Explore at your own leisure
For the purposes of this course we will be using VsCode.
If you open a script file e.g. main.py in the main editor window you can run this directly in the editor without needing to use the terminal. Vscode should detect the UV environment automatically but if this fails you can easily restore the link:
Type ctrl + shift + p (cmd + shift + p on a Mac) and choose Python: Select Interpreter. Select the phys4038, Note that it provides the location: .\.venv\Scripts\python.exe which tells you that you are using the version installed in the folder .venv.
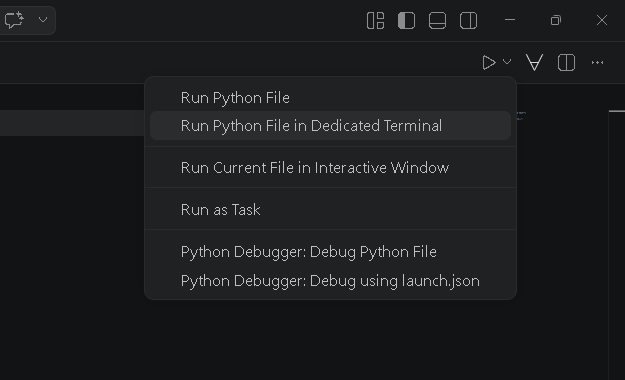
At the top right of your script you should see a little triangular run button. Clicking on this will run your program. Clicking just to the right of this gives you access to a few alternative ways to run the program such as in an interactive prompt with variable explorer.
1.5.2.1 IDEs#
Integrated development environments provide a whole range of tools that make development easier:
Intellisense
Viewing Documentaton
Debugging
Testing
Git integration
Host of add ons
1.5.2.2 Vscode Keyboard Shortcuts#
Sometimes these shortcuts maybe configured differently on different systems. You can see all the keybindings and provide some new ones of your own by going to
File > Preferences > Keyboard Shortcuts. If you are running them on a Mac replace Ctrl with Cmd. Here are a few I use frequently.
Short cut |
Command |
|---|---|
|
Open Command Palette |
|
Indent / unindent selected text |
|
Select all occurences of word |
|
Zoom in or out |
|
Toggle sidebar visibility |
|
Toggle terminal visibility |
In addition to keyboard shortcuts I recommend turning on autosave: File > Autosave. Once logged in to your github account, you can also turn on settings sync to make sure things are setup the same way on any computer you use.
1.5.3 Running code in a Jupyter notebook#
A Jupyter notebook is a format that enables you to mix sections of python code with descriptive cells using a format called Markdown. Vscode can host a Jupyter notebook (that’s the format being used in these course notes and exercises).
1.5.3.1 Code cells#
To run code in the Jupyter notebook you may need to select the environment you setup as we demonstrated above for the regular scripts. In the top right corner of the notebook if you see a button that says phys4038 then vscode has detected the environment automatically. If it still says Select Kernel then click on it and select the .venv environment called phys4038.

Code cells enable you to:
Type python code in directly
shift + Enterto run that cellResults stay in memory so the sequence in which you run cells matters (run the cell below and then the cell below that twice and look at how the output changes)
In vscode the jupyter notebook has all the features we describe in the IDEs section
a=1
a+=1
a
2
1.5.3.2 A crash course in Markdown#
(Note to see how to write the markdown that results in each item below you’ll need to look at the Jupyter Notebook. Double clicking on this cell will show you the Markdown code used)
Markdown comes with multiple ways to do things so here’s a quick guide to doing some common things. The top title can be deined with a # and progressively smaller headings just have more #####.
Titles#
Headings#
subheadings#
subsubheadings#
Write in bold or italics by bracketing text with ** or * respectively.
We can define code blocks with proper syntax highlighting by adding ``` followed by the language (the one below is python but we can also use console, c, html etc)
print('typesetting some code like this')
Draw horizontal lines to delineate sections by using — at the start of a line
Create a web link using Markdown. python homepage
HTML tags generally work although not as readable so use sparingly.
Insert image from a file:
<img src="resources/images/logo.png" alt="Drawing" style="width: 100px;"/>

Insert video from file
<video alt="test" controls style="width: 200px;">
    <source src="test.mp4" type="video/mp4">
</video>
If you want to insert an image or video directly from a url (make sure it is url to image or video and not the page in which they are embedded)
Insert image from url
<img src="https://raw.githubusercontent.com/docker-library/docs/01c12653951b2fe592c1f93a13b4e289ada0e3a1/python/logo.png" alt="Drawing" style="width: 20em;"/>

For video change src attribute in video example.
If you want to do something else you can use html as I have done above or refer to this quick look up guide for Markdown text
1.6 Importing packages#
Once you have installed a package into your environment you can import it into either a Jupyter Notebook or a script you are writing in the IDE. These imports are usually done in a group at the top of your code. In your files you will find a folder called resources which contains a file called example_function.py. Open this in the editor and look at the contents. Python makes importing so easy. A package is a folder containing python files. Individual .py files are modules. Any .py python file can be imported using its name. There are multiple ways to import and they all mean subtlely different things.
To import everything inside example_import.py we can write:
from resources.example_import import *
Whilst this works and you will find a few big projects (e.g. pyqt) which use this syntax it is not recommended. This is because:
I might have two modules imported and by chance they might have functions that are called the same thing. These would then conflict
It makes code harder to understand. If I have lots of imports how do I know which module example_function() came from?
N.B. This is sometimes referred to as “polluting the namespace”. When we look at functions you’ll see that you could have local and global scopes which effect which variables are accessible in and outside a function. A namespace is somewhat similar and consists of the collection of variables, functions, classes accessible to a particular script.
Below are a few far better ways to import and then how to use the imported functions in your code.
import resources.example_import
import resources.example_import as example_nickname
from resources.example_import import example_function

resources.example_import.example_function()
example_nickname.example_function()
example_function()
This is executing the example function
This is executing the example function
This is executing the example function
As we showed above you can import packages and give them a nickname. You usually do this to make it quick to type whilst clearly identifying which package functions have come from. You could use anything but well known packages such as numpy, pandas etc have standard imports which it’s worth following for clarity
import numpy as np
import pandas as pd
import matplotlib.pyplot as plt
import scipy
Warning - Problems importing#
If you install packages using uv then you will be able to import them using their name e.g. import numpy. If you provide the address as we did above relative to where the python file is being run from it will also import them. However, it is worth understanding how python finds packages. If you are looking for a module example_import.py then python searches the current directory and then if it doesn’t find it, it will look in a list of other places that are specified by a path variable. The first time it finds a file with the right name it will stop. You can see this by running:
import sys
print(sys.path)     # This is the list of places python searches
import example_import   # Note it doesn't find this because it is inside the resources folder and so errors
['c:\\python314\\python314.zip', 'c:\\python314\\DLLs', 'c:\\python314\\Lib', 'c:\\python314', 'C:\\Users\\mikei\\AppData\\Local\\uv_envs\\Instructor', '', 'C:\\Users\\mikei\\AppData\\Local\\uv_envs\\Instructor\\Lib\\site-packages']
---------------------------------------------------------------------------
ModuleNotFoundError                       Traceback (most recent call last)
Cell In[4], line 3
      1 import sys
      2 print(sys.path)     # This is the list of places python searches
----> 3 import example_import   # Note it doesn't find this because it is inside the resources folder and so errors

ModuleNotFoundError: No module named 'example_import'
#If we want it to find a file in a different place
import sys
sys.path.insert(0,'resources')  #Add a relative address to the front of the path list
print(sys.path)
import example_import   # Now the import works

example_import.example_function()